How to Repair a Torn Makeup Bag Lining: Sewing Guide
Executive Summary
How to repair a torn makeup bag lining is answered by first identifying the lining fabric, because the repair method follows the material. A 190T polyester taffeta at 55-65 g/m² tears cleanly and takes a hand-sewn patch with a 70/10 needle and polyester thread. A 210D nylon at 95-110 g/m² frays less but resists a needle, and a TPU-laminated or PEVA lining cannot be patched with a needle at all without sealing the stitch line afterwards, since every needle hole is a new path for liquid.
The sequence is prepare, patch, stitch, seal and verify. Prepare by trimming frayed edges square rather than pulling them; patch with a fabric of similar weight and 15-20 mm of overlap beyond the tear; stitch at 2.0-2.5 mm with a 6-10 mm seam allowance and a backstitch at each end; seal coated linings with a compatible seam sealant; then verify with a loaded pull test rather than a visual check. A patch that fails that test, or a lining that has gone tacky, is a case for replacing the bag rather than repairing it.
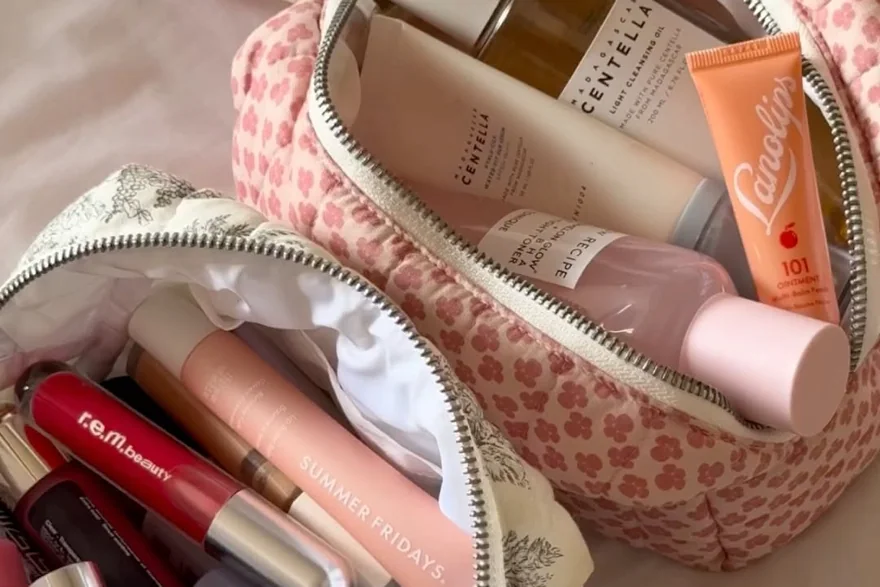
Why cosmetic bag linings tear, and where
A lining is the layer that nobody specifies carefully and everybody notices when it fails. In a cosmetic bag it carries powder, oil, brush ferrules, sharp compact corners and the lateral load of an overpacked closure, all while being the thinnest fabric in the construction. Most lining failures start at one of four places: the seam that attaches the lining to the zipper tape, the bottom corners where the lining meets the shell base, the fold line where a divider is tacked, and any point where a rigid item presses repeatedly against the same spot.
Material drives the failure mode. A 190T polyester taffeta at 55-65 g/m² is the cheapest common lining and it tears cleanly along the weave once a thread is broken. A 210D nylon at 95-110 g/m² resists tearing but abrades into a shiny patch under brush friction. A 300D polyester at 130-160 g/m² is heavy for a lining and is used where the bag must hold a divider without a board. Laminated and coated linings behave differently again: the film carries the load until it is cut, and then the fabric underneath tears far more easily than the film suggested.
Two causes are not mechanical at all. Coating hydrolysis makes a polyurethane-coated lining tacky and then brittle, so it splits at fold lines rather than at stress points. Seam-hole wicking lets liquid into the stitch line, which softens the fibre and lowers tear strength over time. Both are specification issues rather than repair issues, and recognising them saves a wasted repair on a bag whose lining has already reached the end of its life.
- Zipper attachment seam, where the lining takes the closing load directly.
- Bottom corners, where lining meets shell base and contents concentrate weight.
- Divider tacking points, where a fold line is repeatedly creased under load.
- Abrasion patches opposite brush ferrules and compact corners.
- Coating failure at fold lines, which is hydrolysis rather than mechanical damage.
Matching the repair to the lining material
The patch, the needle and the thread all follow the fabric weight. Matching a heavy patch to a light lining is the most common home-repair error: the patch does not flex with the surrounding fabric, so the tear simply moves to the edge of the patch where the stiffness changes. The rule is to patch with a fabric within about 20 percent of the lining weight and to let the patch overlap the tear by 15-20 mm on every side.
| Lining material | Typical weight | Tear behaviour | Needle | Thread | Repair method | Realistic outcome |
|---|---|---|---|---|---|---|
| 190T polyester taffeta | 55-65 g/m² | Tears cleanly along the weave | 70/10 | Polyester Tex 30-40 | Hand or machine patch, 15 mm overlap | Good; lasts as long as the surrounding fabric |
| 210D nylon | 95-110 g/m² | Resists tear, abrades shiny | 80/12 | Polyester or bonded nylon Tex 40 | Machine patch with rounded corners | Good; needle holes may show on a coated face |
| 300D polyester | 130-160 g/m² | Strong, stiff, hard to hand-sew | 90/14 | Bonded polyester Tex 40-60 | Machine patch, two rows of stitching | Good, but hand sewing is impractical |
| TPU-laminated fabric | 120-220 g/m² | Film cuts, then substrate tears | 80/12, ball point | Polyester Tex 40 | Patch plus seam sealant over the stitch line | Fair; sealant needs reapplication |
| PEVA or PVC sheet lining | 180-320 g/m² | Brittle with age, splits at folds | Not sewn | Not applicable | Weld or tape, not stitch | Poor by sewing; use an adhesive patch strip |
| Satin or brushed tricot | 70-100 g/m² | Snags, then runs | 70/10, ball point | Polyester Tex 30 | Patch from behind with a rounded shape | Fair; snag risk remains around the patch |
Thread choice is the second decision and it is usually made by default, which is why repairs fail. Cotton thread rots in the damp conditions a wash bag sees and should not be used. Polyester in the Tex 30-40 range matches most lining weights and resists both moisture and the mild acidity of cosmetic residue. Bonded nylon is stronger but stiffer, and on a light lining it produces a puckered seam line that then abrades against whatever is packed next to it.
Coated and laminated linings need one extra step that fabric linings do not: the stitch line must be sealed. Every needle hole through a film is a channel, and a patch that is perfectly sewn will still pass liquid along the stitch line. A compatible seam sealant applied thinly over the stitch line on the inside, left to cure for the stated time before the bag is used, closes that channel. The sealant changes the hand of the fabric locally, so it should be applied in one thin pass rather than a thick bead.
Abrasion deserves a note of its own, because it is the mechanism that most often precedes a tear. A brush ferrule rubbing the same 2 cm of lining twice a day will shine the fabric within weeks and break threads within months. That behaviour is measurable rather than subjective, and buyers who specify pale or printed linings normally ask for abrasion and rubbing checks from the AATCC test methods collection before the lining is approved.
- Patch with a fabric within about 20 percent of the lining weight, overlapping the tear by 15-20 mm.
- Use polyester thread in the Tex 30-40 range; cotton rots in a damp bag.
- Seal every stitch line on a coated or laminated lining, since needle holes are channels.
- Round the patch corners; square corners are where the next tear starts.
- Treat hydrolysis, not tearing, when a lining is tacky: the repair will not hold.
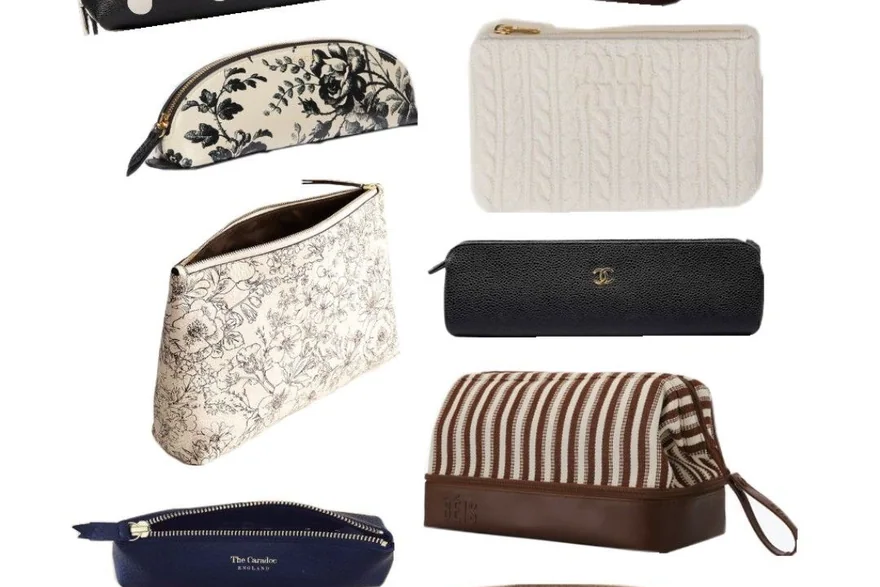
The sewing sequence: prepare, patch, stitch, seal
Preparation decides most of the result, and it is the step people skip. Trim frayed threads flush rather than pulling them out, because pulling removes threads from the weave on both sides of the tear and enlarges the hole. Then square the tear: cut the damaged area into a rectangle or an oval with clean edges, removing 3-5 mm of sound fabric around the damage. A clean-edged hole takes a patch; a ragged one does not.
- Empty the bag and turn the lining out as far as the seam allows; if the lining is fixed to the shell, work through the opening rather than unpicking the shell.
- Trim frayed threads flush, then cut the damaged area into a clean rectangle or oval with 3-5 mm of sound fabric removed around it.
- Cut the patch 30-40 mm larger than the hole in both directions, with rounded corners, from a fabric of similar weight.
- Position the patch behind the hole, wrong side against wrong side, and tack it at four points so it cannot shift while sewing.
- Stitch around the hole at 2.0-2.5 mm stitch length, 4-6 mm from the cut edge, backstitching three stitches at the start and end.
- Add a second row 3-4 mm outside the first on high-stress repairs such as a zip seam or a bottom corner.
- On coated linings, apply a thin pass of compatible seam sealant over both stitch rows and leave it to cure for the stated time.
- Turn the lining back, repack to about 70 percent, and run the loaded pull test described below.
| Operation | Needle | Thread | Stitch length | Seam allowance | Note |
|---|---|---|---|---|---|
| Patch a 190T taffeta lining by hand | 70/10 sharps | Polyester Tex 30 | 2.0-2.5 mm | 6-10 mm | Whip the cut edge first to stop fraying |
| Patch a 210D nylon lining by machine | 80/12 | Polyester Tex 40 | 2.0-2.5 mm (10-12 spi) | 8-10 mm | Reduce presser pressure to avoid puckering |
| Reattach lining to zipper tape | 80/12 | Polyester Tex 40 | 2.0 mm | 6-8 mm | Keep the element line 3-4 mm clear of the fabric edge |
| Reinforce a bottom corner | 90/14 | Polyester Tex 40 | 1.8-2.0 mm | 10 mm | Two rows 3-4 mm apart, rounded profile |
| Seal a coated lining stitch line | Not applicable | Not applicable | Not applicable | Not applicable | One thin pass, full cure before use |
Two details separate a repair that lasts from one that opens in a fortnight. The first is stitch density: below about 2.5 mm a lining seam holds, and above it the thread bridges rather than grips, which is why a loosely hand-sewn patch fails at the stitch line rather than at the fabric. The second is the rounded patch profile: a rectangle with square corners concentrates stress at four points, and those four points are where the next tear begins.
Heat is the hidden risk in this sequence. Fusible interfacing is tempting for stabilising a thin lining, but the iron temperature that bonds a 40-60 g/m² interfacing is close to the temperature that damages a polyurethane coating or a printed face. On a coated lining, use a sew-in stabiliser instead, or a patch with a compatible film applied at the lowest stated temperature through a pressing cloth, and test on an offcut first.
Repack the bag to about 70 percent of internal volume, close it, and pull gently across the repair in the direction the tear originally ran, holding for ten seconds. Then open and close the zip twenty times. A repair that survives both will hold in normal use; one that passes only when the bag is empty has simply not been tested.
- Trim, do not pull, frayed threads; pulling enlarges the hole in both directions.
- Round the patch corners and keep two stitch rows 3-4 mm apart on stress points.
- Keep 2.0-2.5 mm stitch length; longer stitches bridge instead of gripping.
- Avoid fusible interfacing on coated linings; use a sew-in stabiliser and test on an offcut.
- Cure any sealant fully before the bag is repacked, or the stitch line will block and crack.
Verifying the repair and setting the re-spec threshold
A repair is a single-unit action and a specification is a programme action, and the line between them is crossed when the same failure appears repeatedly. If the same lining tears in the same place across several units of one style, the cause is the construction: lining too light for the load, a seam allowance too narrow, a divider tacked without a binding, or a coating that does not survive the contents. Repairing unit by unit in that situation costs more than one specification change.
| Failure seen | Repair route | Expected service after repair | Re-specify when |
|---|---|---|---|
| Clean tear away from any seam | Patch behind, two stitch rows | Comparable to the original lining | Never; a one-off event |
| Tear at the zipper attachment seam | Reattach tape, 6-8 mm allowance | 6-12 months of daily use | The same seam fails on more than a few units |
| Bottom corner split | Reinforced patch, rounded profile | 6-12 months | Corners split on bags under a year old |
| Abraded shiny patch under brushes | Patch plus a covered brush sleeve | 3-6 months without the sleeve change | Abrasion appears before six months of use |
| Tacky or flaking coated lining | None | Not repairable | Immediately; change coating or lining |
| Stitch-line wicking in a wet compartment | Sealant over the stitch line | 3-6 months before reapplication | The compartment is specified as leak-resistant |
The specification levers are few and cheap. Lining weight is the first: moving a 20-24 cm pouch from 190T at 55-65 g/m² to 210D at 95-110 g/m² typically adds $0.08-$0.25 per unit and roughly doubles resistance to a brush-abrasion patch. Seam allowance is the second: 6 mm is the practical minimum at a zipper attachment and 10 mm is better at a base corner. Binding the top edge of a divider is the third, since a bound edge keeps the divider vertical instead of leaning into the lining.
Two failure patterns deserve a specific note because they are routinely misdiagnosed as user damage. A lining that splits at a fold line away from any seam is a coating problem, not a loading problem, and it will appear on every unit of the style rather than on a few. A lining that abrades through in the same 2 cm patch opposite a brush sleeve is a geometry problem, and it is fixed by covering the sleeve rather than by thickening the fabric. Both are visible on a single sample, which is why a lining should be assessed opened and packed rather than flat on a table.
Any change should be validated on a run rather than on one sample. Lining repairs and lining failures are both visible at inspection, and a tear-strength or abrasion check drawn under ISO 2859-1 at AQL 2.5 tells the buyer more than a visual pass. A lining change runs at 500 pieces per style and colourway minimum, samples in 6-10 working days (12-15 working days for complex constructions), bulk in 35-50 days after approval, FOB Xiamen, T/T 30 deposit and 70 against bill of lading. Where the lining sits in contact with carried products, buyers also ask for the OEKO-TEX Standard 100 certificate for the fabric and any coating.
- Repeating tears in the same place are a construction problem, not a repair backlog.
- Lining weight is the cheapest lever: 190T to 210D adds about $0.08-$0.25 per unit.
- 6 mm minimum seam allowance at a zip attachment, 10 mm at a base corner.
- Bind the top edge of a divider so it cannot lean into and cut the lining.
- Tacky or flaking coatings are not repairable; change the material at the next order.
The B2B Customisation View
Cost, compliance and craft pull against each other on every cosmetic pouches, vanity cases and beauty organisers project; the specification is the record of how those three forces were balanced.
Commercial parameters stay fixed across the range: MOQ 500 pieces per style and colourway, prototype turnaround 6–10 working days (extended to 12–15 for multi-panel or moulded builds), bulk lead time 35–50 days from approved sample, AQL 2.5 inspection to ISO 2859-1, FOB Xiamen, T/T 30 deposit and 70 against bill of lading.
Buyers who use a programme coordinator keep their own supply-chain optionality; the technical pack travels, so production can be re-placed if a launch is brought forward.
Which Brand Types Benefit Most
Lining specification is the least discussed and most complained-about part of a cosmetic bag programme, and the five buyer types gain from treating it as a decision rather than a default. Start-up brands almost always inherit the cheapest lining on a stock sample and discover the consequence in season one; moving from 190T to 210D costs cents and removes the most common lining complaint before it is ever written. Established brands with premium ranges have the reverse risk, where a satin or brushed tricot lining looks right in a photograph and snags in a handbag; the answer is a snag and abrasion check at approval, not a heavier fabric. Retailers and wholesalers buying across price bands should fix a minimum lining weight for each band so a $3 pouch and a $9 case fail at different ages rather than the same one. E-commerce sellers gain from stating the lining material and weight in the listing, because lining failure is among the most cited negatives in the category and a stated fabric answers it directly. Gift and hospitality buyers, whose bags may be filled and stored for a season, should specify a lining coating with a documented safety credential and a wipe-clean face, since a filled bag that sits closed for months will show any coating weakness on first opening.
- Start-up brands: specify 210D rather than 190T on the first sample; the cost is cents and the complaint never arrives.
- Established brands: run a snag and abrasion check on decorative linings before approval, rather than after launch.
- Retailers and wholesalers: set a minimum lining weight per price band so failure ages differ sensibly across the range.
- E-commerce sellers: publish the lining material and weight in the listing to pre-empt the most cited negative.
- Gift and hospitality buyers: require a documented, wipe-clean coating for bags that are filled and stored before use.
Frequently Asked Questions
What needle size should be used on a 190T polyester lining?
A 70/10 sharps needle with polyester thread in the Tex 30 range. Anything larger leaves visible holes in a 55-65 g/m² fabric, and a ball-point needle is unnecessary on a plain taffeta weave. Change the needle after the repair, since a needle dulled on a coated shell will snag the lining on the next job, and a fresh needle costs less than a second repair.
Can a torn lining be repaired without a sewing machine?
Yes on lightweight linings. A 190T or satin lining takes a hand-sewn patch with a running stitch reinforced by a whip stitch over the cut edge; heavier 210D and 300D linings are impractical by hand because the needle resistance tears the thread before the stitch pulls tight. Machine work is preferred wherever the lining can be turned out.
What patch fabric works best behind a torn lining?
A fabric within about 20 percent of the lining weight, cut 30-40 mm larger than the hole with rounded corners. Matching weight matters more than matching colour, because a patch that is stiffer than the surrounding lining simply moves the tear to the patch edge. Offcuts from an old bag of the same type are often the best source.
How much overlap should a patch have beyond the tear?
15-20 mm of sound fabric on every side, with the stitch line 4-6 mm in from the patch edge. Less than 15 mm puts the stitch line too close to the damaged area and the tear simply runs past it; more than 25 mm creates a stiff panel that flexes differently from the rest of the lining and moves the failure to the patch boundary.
Why does a lining tear at the zipper seam first?
Because that seam carries the closing load. Every time an overpacked bag is zipped, the lining is pulled laterally against the stitch line, and a 6 mm allowance with a 3 mm stitch length gives very little fabric for the thread to grip. Reattaching at 2.0 mm stitch length with 6-8 mm of allowance, and keeping the element line 3-4 mm clear, stops the repeat.
Can a TPU-laminated lining be sewn without creating leak paths?
Not by stitching alone. Each needle hole through the film is a channel, so a sewn repair on a laminated lining must be followed by a compatible seam sealant applied thinly over the stitch line and cured fully. That reduces wetting along the repair; it does not make the compartment waterproof, which depends on the whole construction including welded seams and a coated closure.
What stitch length is right for a lining repair?
2.0-2.5 mm, which is 10-12 stitches per inch. Shorter than about 1.8 mm perforates a light fabric and weakens it along the line; longer than 2.5 mm lets the thread bridge rather than grip, and the repair then opens at the stitch line rather than in the fabric. Two rows 3-4 mm apart suit high-stress points such as a base corner.
How do you stop a rip in a lining from running further?
Trim the frayed threads flush rather than pulling them, then cut the damaged area back to a clean rectangle or oval with 3-5 mm of sound fabric around it, and whip the cut edge before patching. On a woven taffeta, a single dropped thread will run several centimetres within days if it is left in place, which is why cutting back to sound fabric is the step that actually stops the run.
Does fusible interfacing damage a coated lining?
It can. The bonding temperature for a 40-60 g/m² interfacing is close to the temperature at which a polyurethane coating softens or a printed face shifts. Where stabilising is needed on a coated lining, use a sew-in stabiliser, or test a fusible on an offcut through a pressing cloth at the lowest stated temperature before touching the bag.
How is lining seam strength or abrasion resistance tested?
By laboratory methods rather than by hand pulling. Abrasion and rubbing resistance are normally checked against methods in the AATCC test methods collection, and tear or seam strength against the relevant ISO or ASTM textile methods. Buyers specify the method, the cycle count and the pass level in the tech pack, then verify on sampled units at AQL 2.5.
Can a lining that has gone tacky be repaired?
No. Tackiness means the polyurethane coating has hydrolysed, so the polymer itself has broken down rather than the fabric. A patch sewn onto a degraded coating will pull away within weeks because the substrate around it keeps degrading, and no adhesive changes that. The remedy is a material change on the next order, not a repair on this one.
Should the whole lining be replaced or just patched?
Patch unless the damage covers more than roughly a quarter of the panel, or the coating has failed. A full lining replacement on a sewn-in construction means unpicking the zip attachment seam and the base, which on a low-unit-price bag costs more in labour than the bag. Bags with a drop-in lining are the exception and are worth replacing wholesale.
What thread type suits a cosmetic bag lining?
Polyester in the Tex 30-40 range. It resists the damp conditions a wash bag sees and does not weaken under mild acidity from cosmetic residue. Cotton thread rots in that environment and should be avoided; bonded nylon is stronger but stiffer and produces a puckered seam that then abrades against packed contents, which is why it suits webbing rather than lining.
How long does a patched lining last in daily use?
A well-matched patch on a sound fabric lasts as long as the surrounding lining, typically six to twelve months of daily use at a zip seam or corner. A patch on an abraded or coated-failed area lasts three to six months at best, because the cause of the original failure is still present and will act on the patch edge.
When should a buyer re-specify lining weight instead of repairing?
When the same failure appears across several units of one style. Moving from 190T at 55-65 g/m² to 210D at 95-110 g/m² costs roughly $0.08-$0.25 per unit and roughly doubles abrasion resistance. The change runs at 500 pieces per style and colourway, samples in 6-10 working days, bulk in 35-50 days after approval, inspected at AQL 2.5 under ISO 2859-1.
People Also Ask
Can you fix a ripped makeup bag lining?
Usually yes. Trim the frayed threads, cut the hole back to a clean shape, patch from behind with a fabric of similar weight and 15-20 mm of overlap, and stitch at 2.0-2.5 mm with rounded corners. The exceptions are a tacky or flaking coated lining and a PEVA sheet lining, neither of which takes a sewn patch well. A patch on a clean tear usually outlasts the lining around it.
What fabric is used for makeup bag lining?
Most commonly 190T polyester taffeta at 55-65 g/m² on entry-level pouches, 210D nylon at 95-110 g/m² on mid-range bags, and 300D polyester at 130-160 g/m² where the bag must hold a divider without a board. Coated and laminated versions, including TPU and PEVA, are used for wet compartments and wipe-clean interiors. Lining weight matters more than colour when choosing a replacement fabric.
How do you stop a rip in fabric from getting worse?
Cut the damaged area back to a clean rectangle or oval with 3-5 mm of sound fabric around it, whip or overlock the cut edge so that it cannot fray, then patch from behind with rounded corners and two rows of stitching 3-4 mm apart. Ragged threads left in place will run several centimetres within days of use. Flexing the area before stitching shows whether the surrounding lining is still sound.
Is it worth repairing a cosmetic bag?
It depends on the failure. A spread zipper slider, a lost stop, a loose pull or a clean tear away from a seam are all worth twenty minutes with a needle. A tacky coating, a failed zip chain or a torn PEVA lining are not, and at a unit price band of $0.45-$12.00 replacement is often the cheaper answer. A quick check of the coating, elastic and zip before starting settles it.
Request a Sample or a Written Quotation
Send the silhouette, dimensions, material preference and logo artwork, and the programme team will return a written quotation with MOQ, sampling window, bulk lead time and inspection standard.
Email: service@junyuanbags.com · WhatsApp: +86 177 5002 0688